

Step by Step Procedure to Wrap a Texture or Pattern Around an Object in Photoshop CS6
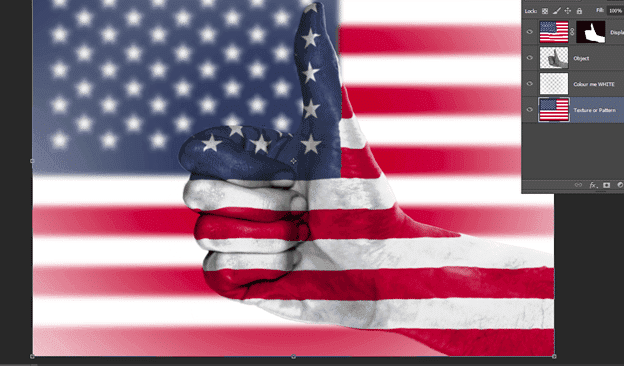
How to Wrap a Texture or Pattern around an object in Photoshop CS6 – Today we will be reviewing how to wrap and flag around a hand giving the thumbs up. The effect gives the look and feels of a painted hand, the technique, however, can be practical across many different applications.
Youtube tutorial at the end.
Image Size
4032 x 3024
Texture Size
4032 x 3024
Firstly you must have prepared a cut out of your image that you intend to wrap your texture around.

How to Wrap a Texture or Pattern around an object in Photoshop CS6
Open the texture or pattern that you wish to wrap around your object (in this case my hand)
Select Move Tool (V)
Drag your object onto the target texture creating your first layer.
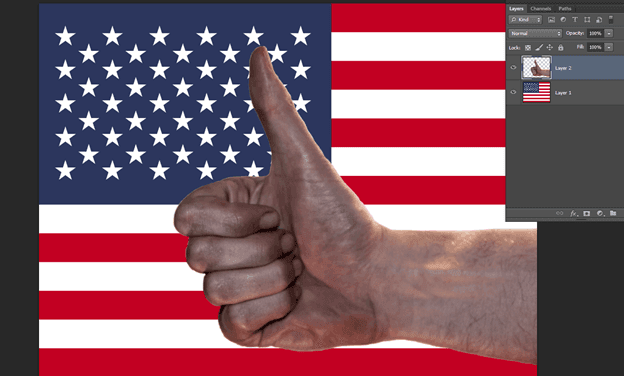
Just place the object in a rough position for the minute.
Click – Edit – Free Transform (Control T) and move the object into the location and dimension you would like it to be. NOTE this will be its final location so think carefully at this stage of the optimal location.
Once in the correct location, you will see a small tick in the top menu click this to finalise.

How to Wrap a Texture or Pattern around an object in Photoshop CS6
Next, we are going to use the displace filter, which is located at:
Click – Filter – Distort – Displace

Upon opening this little gem it will ask you to apply a horizontal and vertical (don’t worry about this just yet!)
It will expect you to upload a displacement MAP. What’s a displacement MAP I hear you ask! All will become apparent shortly.
The displacement MAP bends the pattern/texture, in this case, the Star-Spangled Banner into the contours and shape of the object.
On we go.
Please close the layer with the pattern/texture leaving only your cut out object.
How to Wrap a Texture or Pattern around an object in Photoshop CS6
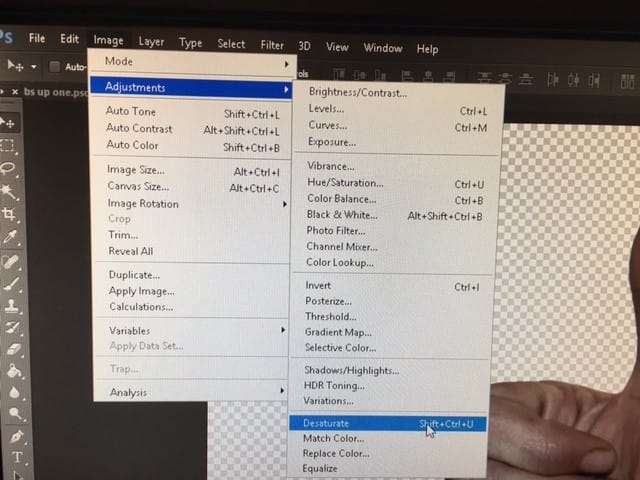
We need a black and white version of the hand:
Select from the top menu:
Image – Adjustments – Destaturate (Shift + Ctrl + U)
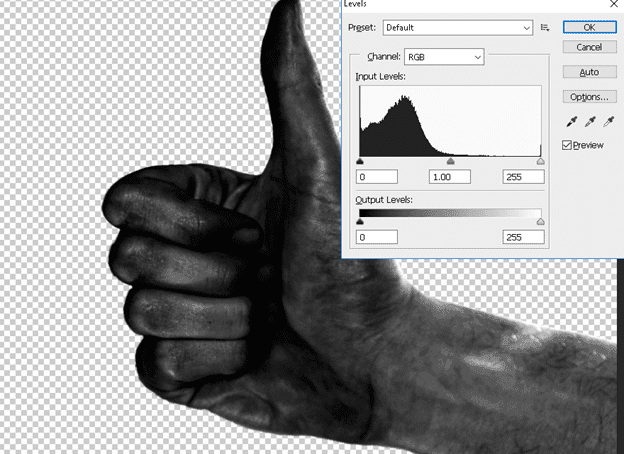
You require for your displacement map a high/good contrast. This is because the displacement map looks at the tones in the picture.
For instance
White will push one direction
Black pushes another direction
Mid Grey will be left untouched.
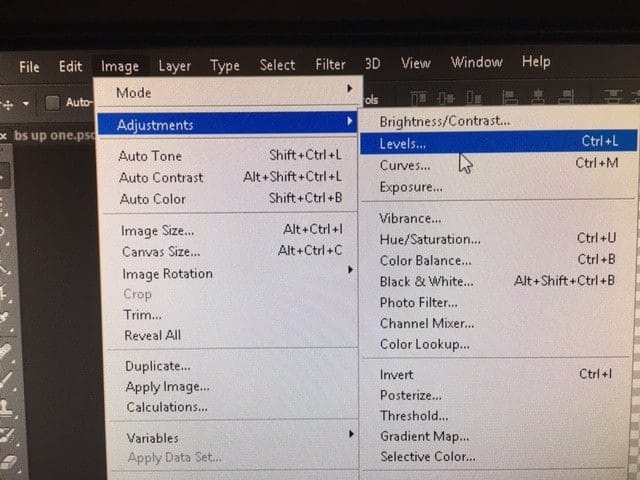
Select – Image – Adjustments – Levels (Ctrl L)
How to Wrap a Texture or Pattern around an object in Photoshop CS6
Create a high contrast image to maximise your wrapped effect.
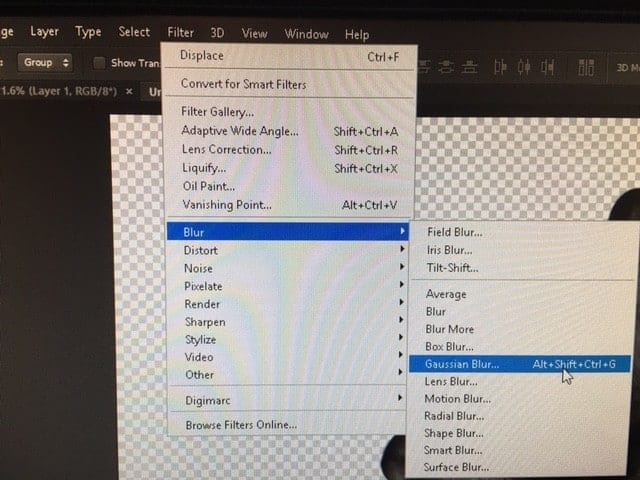
As you can see this image is currently very sharp. You must apply a blur between 4-10 to ensure an optimal result.
Select
Filter – Blur – Gaussian Blur

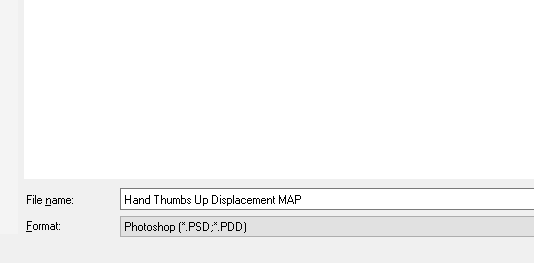
Now we need to save our displacement MAP
I recommend calling it whatever your object is and add displacement map in the end.
How to Wrap a Texture or Pattern around an object in Photoshop CS6
You now have a displacement map ready for use.
Now you want to turn your hand back to its original desaturated appearance.
To do this
Click
Edit – Step Backward (Ctrl + Alt + Z)

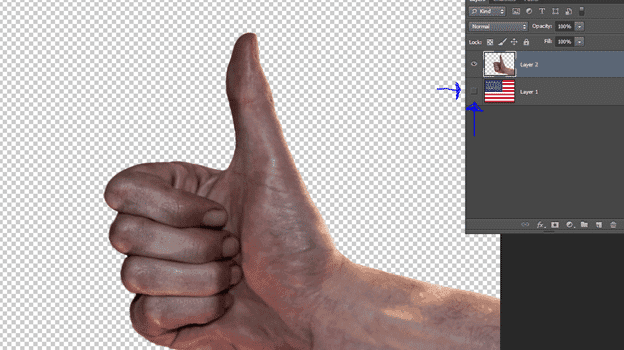
Upon successfully getting back to your original hand, make an additional layer of your texture or pattern.
To do this select:
The target layer
Then the top right layers palette
Now click duplicate layer.
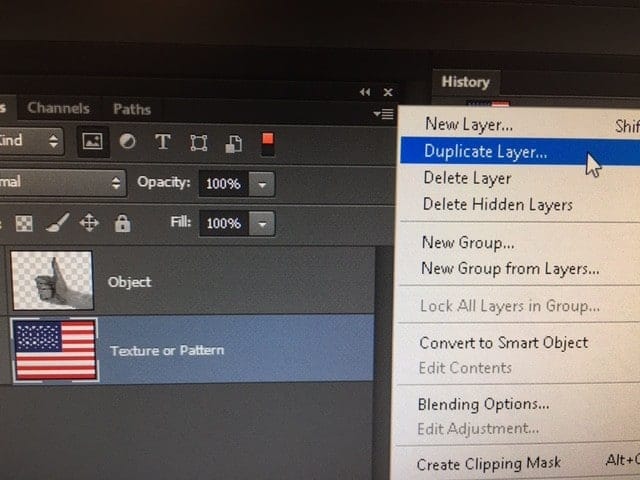
The layer must be positioned above the object layer.
I have named it the displacement layer to avoid any confusion.

How to Wrap a Texture or Pattern around an object in Photoshop CS6
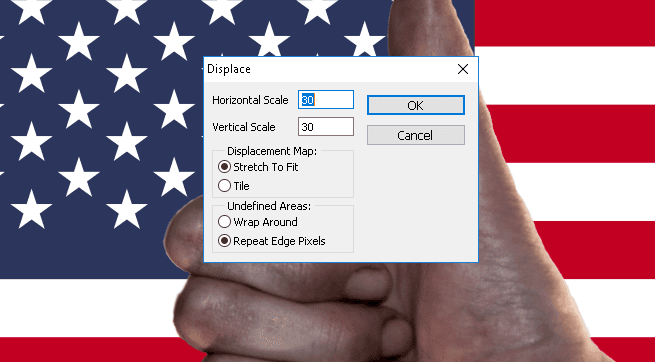
Now go to
Click – Filter – Distort – Displace
I find between 20 and 30 to be perfect for wrapping textures and patterns around objected but you must find a level that suit you have a play around.
Select the displacement map that you created earlier on.

You should see the centre off you pattern smudge / distort this is good.

How to Wrap a Texture or Pattern around an object in Photoshop CS6
You now must select your object layer by actually selecting your object:
To do this hold control and right-click the layer
You will end you with your image looking like this:

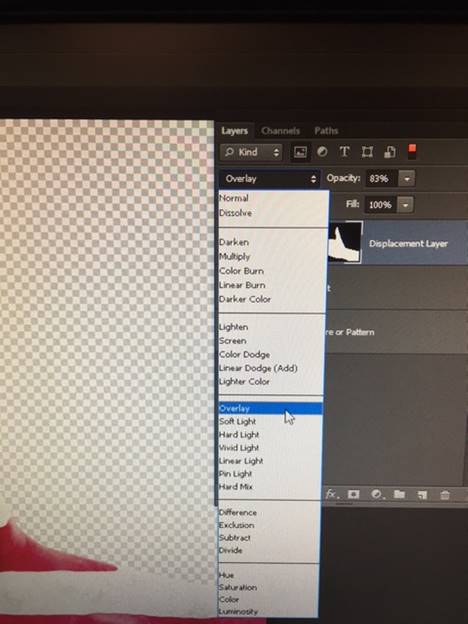
Now you must add a layer mask with the displacement layer highlighted.

Once you click the button you will end up with a hand looking like this:

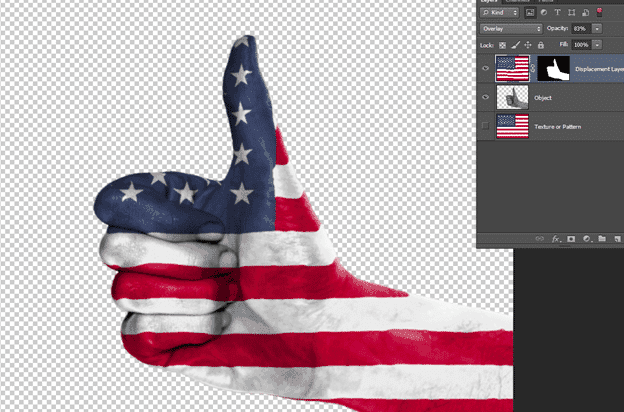
Now select overlay and drop the opacity to a level that suits your style. You can see the look is good but the image is lacking a little depth.
How to Wrap a Texture or Pattern around an object in Photoshop CS6
Select (the image not the layer mask)
Filter – Blur – Gaussian Blur
And adjust between 2-4 until have desired effect.
Then select
Image – Adjustments – Levels (Ctrl L)
Adjust the level to suit your requirements and desired finish.
How to Wrap a Texture or Pattern around an object in Photoshop CS6
Now add a background
Select your texture or pattern layer
And click add layer

Select the paint bucket (G) and set the colour to white:

You will have something like this:

Now select the eraser tool (E).
Set the tool to
Hardness 0
Size 5000 pixels
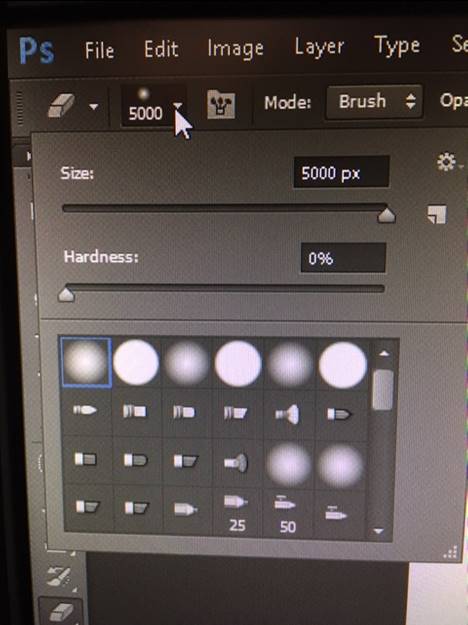
Use the brush tool until you have achieved the desired effect I find two clicks works well.

How to Wrap a Texture or Pattern around an object in Photoshop CS6
Now blur you background
Select
Filter – Blur – Gaussian Blur
Adjust until you’re happy
And now utilize free transform to slightly offset the flag and add more depth to the image.
Click – Edit – Free Transform (Control T)

Well done now upload your images to http://www.publicdomainphotography.com/ and share your creations with the world.
Hope you enjoyed this step by step tutorial in How to Wrap a Texture or Pattern around an object in Photoshop CS6 – Please comment and feedback.
Absolutely Amazing Top Ten Free Royalty Free Stock Photos
Free Stock Photography, Public domain Images, and Photographs
Fun Fact
Is there a unfastened model of Photoshop? Yes, you may down load a 7-day unfastened trial of Photoshop. The unfastened trial is the official, complete model of the app — it consists of all of the functions and updates withinside the brand new model of Photoshop. Can I down load an ordeal model of Photoshop CS6?Is Photoshop CS6 is free?
Also See : Image Sharpness – Digital Photography


